Lost Sock Creations

Lost Sock Creations
what it's all about...

Wednesday, April 24, 2013

Rainbow Origami Crane Mobile


Sadako Sasaki 
Sadako Sasaki, a young girl of twelve, develops leukemia caused by exposure to the atom bomb dropped on her city of Hiroshima, Japan at the end of WWII. While in the hospital, Sadako learns to fold origami cranes and believes that folding the cranes might lead to the granting of a wish. A loving and compassionate child, Sadako's life inspires her classmates to create a memorial in her honor, to remember all the children impacted by war.

This statue was made in honor of Sadako. People still bring paper cranes to it. 
                                                  
You need white computer paper, pencil and scissors. 


This crane mobile was a project my kids worked on while I was out on maternity leave years ago. 
I left the sub a lesson for origami crane folding and asked for an array of colors.
Kids used old magazines instead of origami paper. 
They pulled out pages that had a large amount of one color and made them into a square. 
After folding them into origami cranes, they were arranged into color order, connected with fishing line and then hung from a bamboo stick. This is in our cafeteria as an art installation. It hangs about 7 feet tall.
---------------------------------------------------------------
Also, you can make the cranes and stuff candy inside. 
Insert a stick through bottom for party favors too. 
I did this for my daughter's first Birthday party, which is May 5, 
the National Children's Peace day in Japan . 
I used scrapbook paper. It is patterned and comes square. 


Don't have origami paper? 
Cut your paper in to a square and Decorate. 


Listen to this music to get you in the mood to make origami,,,


Monday, April 22, 2013

Bubble Burst

Blow you mind... or burst your bubble... or just BLOW BUBBLES!


Begin Bubble Burst by 
Studying the way bubbles look...
Click on the images below (from Google Image Search)
What do all the bubble have in common?
1. Perfectly Round
2. Rainbow/iridescent- tints/pastels of the rainbow. 
3. Rings of color- color is circular with the contour of the sphere. 
4. White highlights/reflections from sun
5. Brighter & more colorful on the outside
6. Transparent to background in middle.
See through when overlapped.
7. Seem to get smaller as they float further away 
If you REALLY study bubbles,
you notice the top and bottom are a reverse mirror of each-other. 
The darks areas of the bubble are reflections of the world around it.

What color IS a bubble? 
ir·i·des·cent /ˌirəˈdes(ə)nt/
adjective

showing luminous colors that seem to change when seen from different angles. 
The dragonfly;s wings looked white until I noticed the green and purple hints as it moved on my hand. 
Find colors that look iridescent. 
I like to use Prisma Colors because they blend well together.
You really only need three colors (canary yellow aquamarine and mulberry)
 since they create new colors when you overlap them. 
This one below used only these three colors and white...


Use crayola construction paper crayons or PrismaColor colored pencils. 
Get a circle tracer. 

Optional Video Lesson


THis video was created for lower grade level using construction paper crayons....

This is getting more advanced now... 
This video really helped me take my bubble to the next level... 

This video is like the one before, but gets even more advanced...

TRACING CIRCLES
Trace 7 or more circle onto paper. 
Some can go off the page, some can overlap, some can be big, some can be little. 


HIGHLIGHTS
Begin with the white colored


Fall 2023

Tayden

Sunshine & Madelynn 

Victoria, Shaunna, & Brooklynn 
———
Fall 2022-6th grade
Kaylee, Peyton, 
Justo, & Kiara

Ashleigh Dixon 

Spring 2022
Camden, Cooper, landyn, 
Paislee, Ashley, kee’Mario
Eduardo 6th grade

   Elva, Sumroot, 
Carl, Kenneth. 

Spring 2021
Emma, Ayden b., Estrella,
Laney, Jaycee, Uriel.

2020 Fall
8th period 
Carol (big one), 
Terry, Grayson, Jeremiah and Kenzi

3rd period: Milo, Nathalie, 
Kelley, Alexandra, 
Jarezi, Valerie
Aubrie and Avery 

Fall 2020
2nd period- Abbey, Ethan, 
Lucy, Audrina, 
Jaxon and Averie 


2020 Spring
1st period Bubbles 2020 (above)

Yuka, Desiree,
Stephanie, Victoria,
 Sa’Niya, Rylee,
Katie & Kaylynn


2nd Period Bubbles 2020 (above)
 Emmily, Mariana,
Yareli, Lucy,
Addyson & Moses

3rd Period Art 2020
Caroline, Danielle,
Josilen, Bailee,
Brooklyn & Brielle


4th period Bubbles 
Jackie, Krissie & Riley


8th period bubbles
Makena, Breanna,
Alexander, Preciosa & Tania


9th period Bubbles
Luke, Maiyah,
Nathalie, Gage, Shayla,
And Jorja.

MMS Art 2019-20 done with PrismaColor Colored pencils

(above)


These images below were done in 2013-14 at MMS 
with construction paper crayons
Araceley 6th grade
Chance 6th grade

Garrett 6th grade
Kimberley 6th grade
Omar 6th grade
Davion 6th grade

It is all about experimenting...

This was Davion's original picture. I actually LOVE it!... But, it did not look like bubbles to me.
So, I instead will use it as a successful free center of his. 
I gave him the choice to redo it and capture a more realistic "bubble" quality. 
He did it with a wonderful attitude. 
But, his marbles are Marvelous! 

More Done later by my 7th and 8th graders...

Brianna 7th grade

Brianne 8th grade

Cederick 8th grade

Cheyenne 7th grade

Ellie 7th grade

Fernando 7th grade

Haley 7th grade

Haylie 8th grade

Hugo 7th grade

Juanita 7th grade

Luz 7th grade

Mariella 7th grade

Shanna 7th grade

 
Todd 7th grade


TAKE IT A LITTLE FURTHER! with this lesson!
See Here...
                      http://tabithaannthelostsock.blogspot.com/2016/04/rainbow-p.html


____________________________________________________

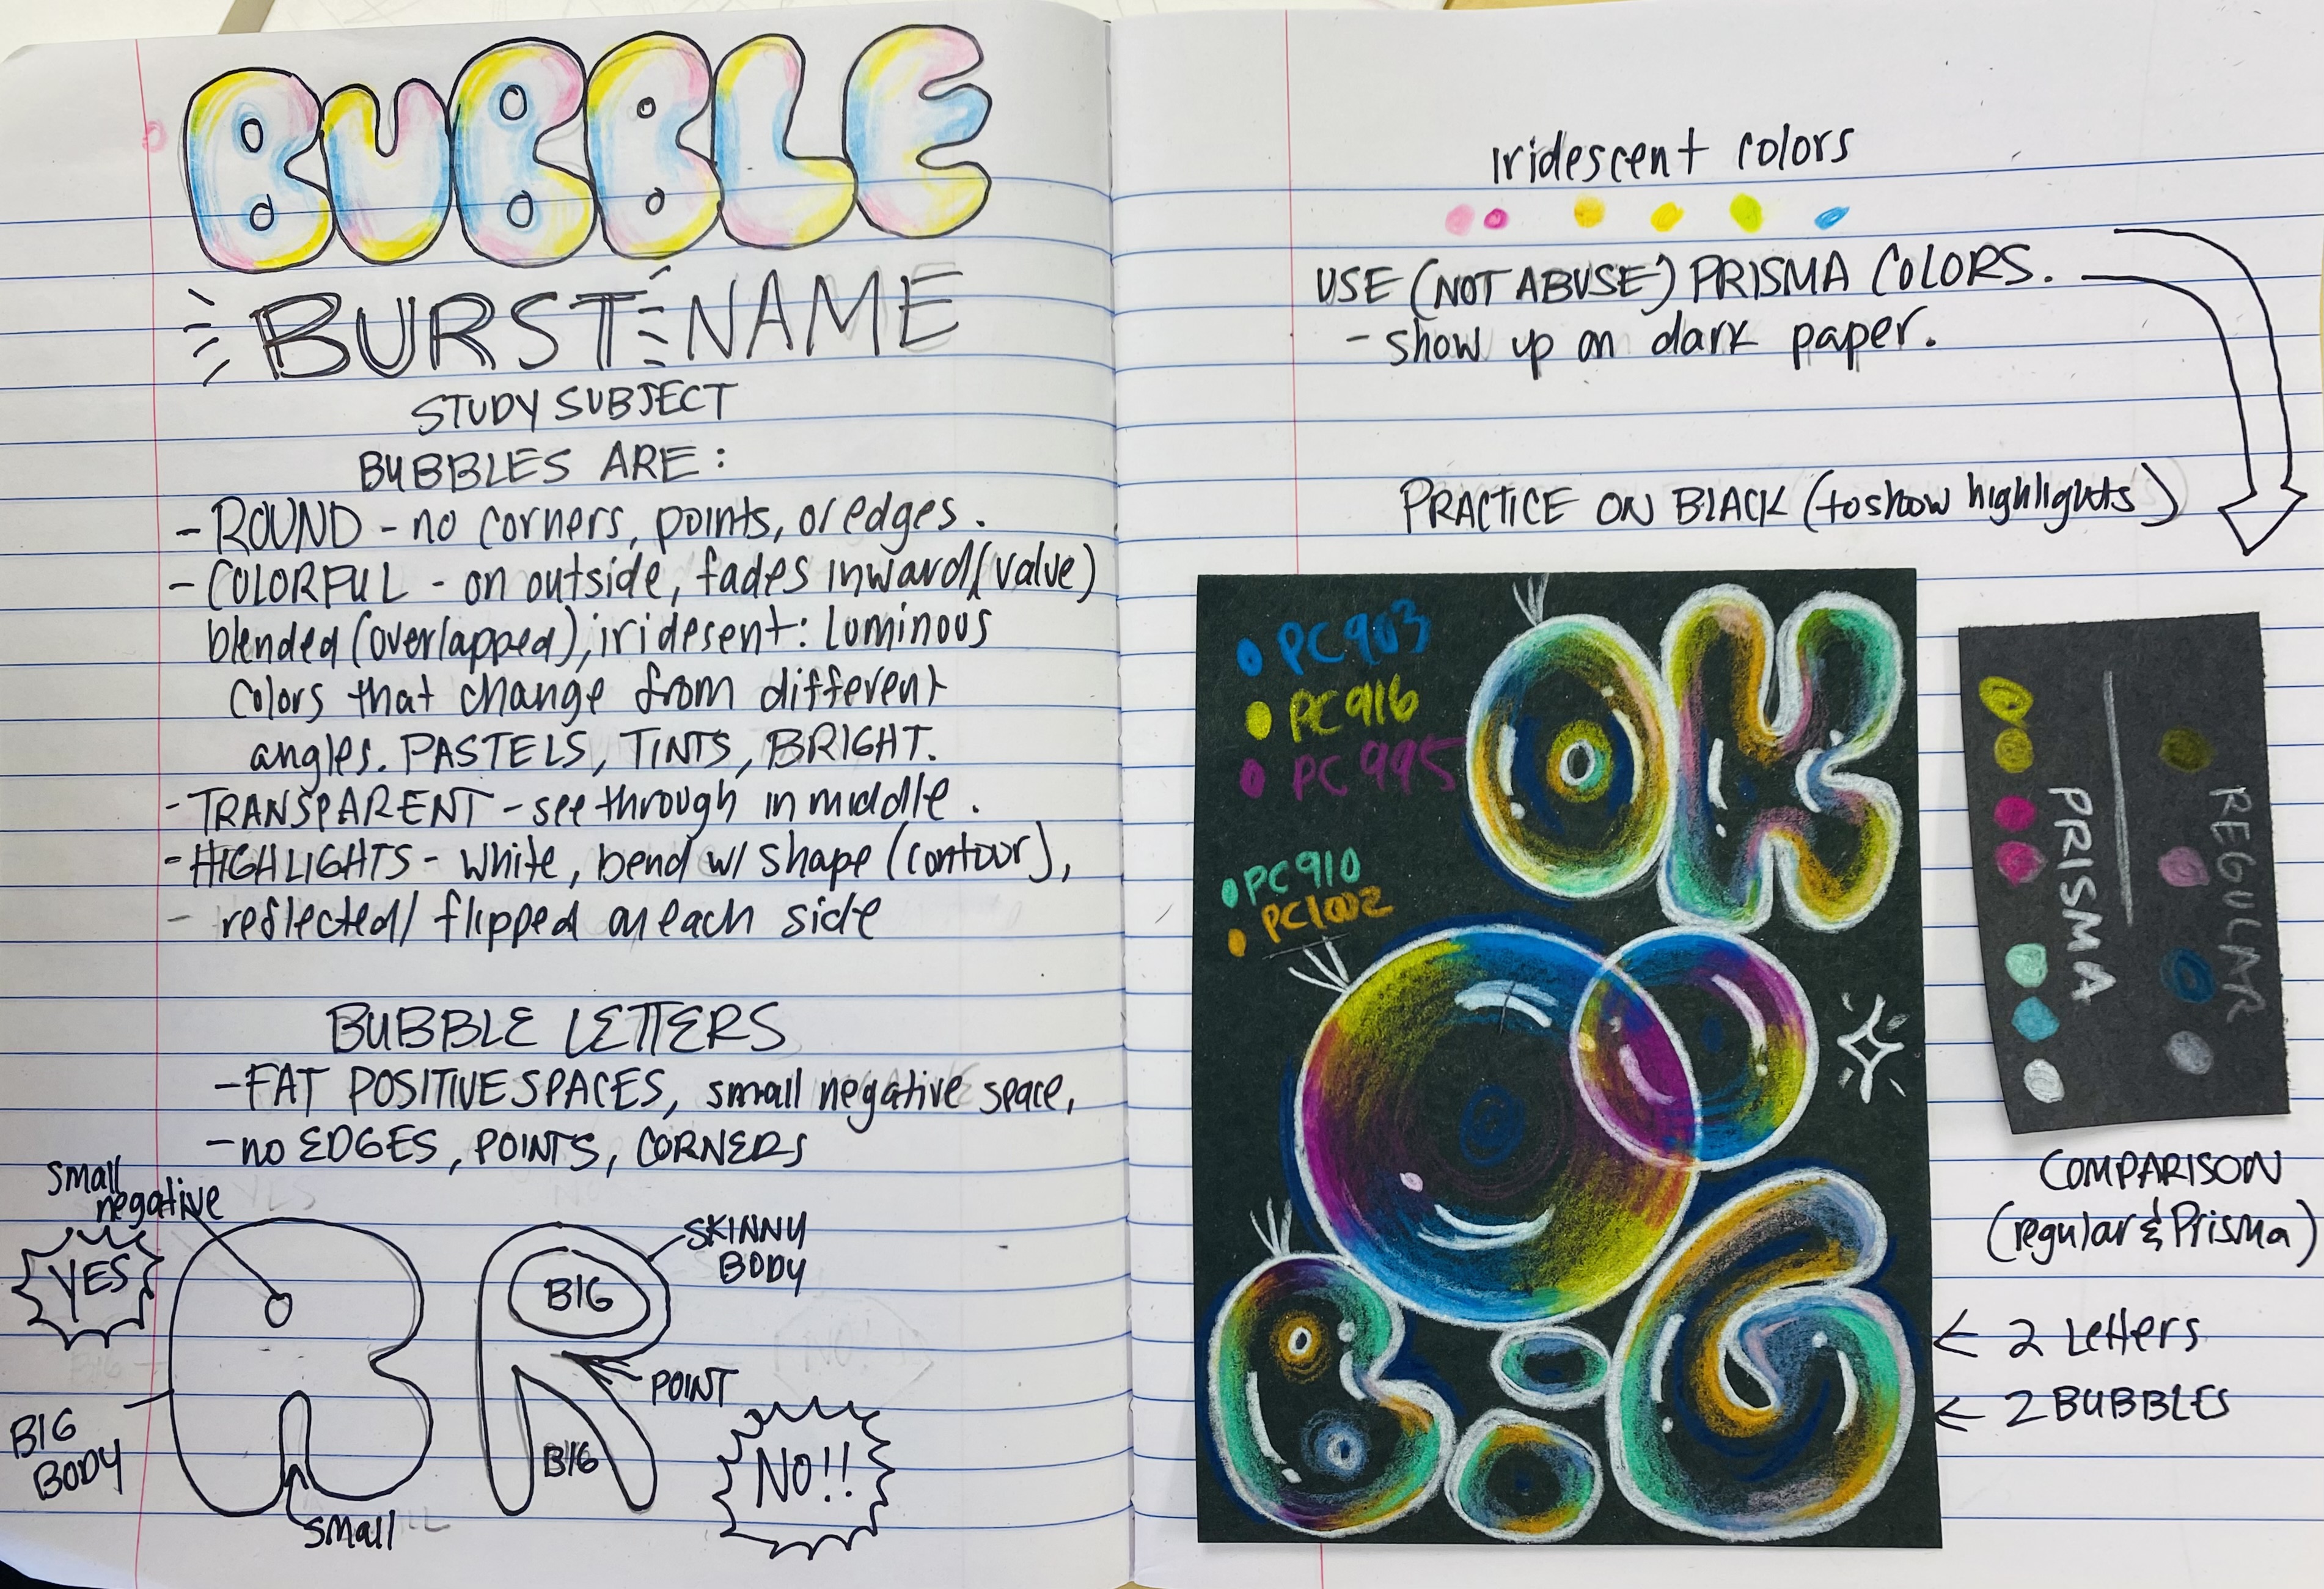
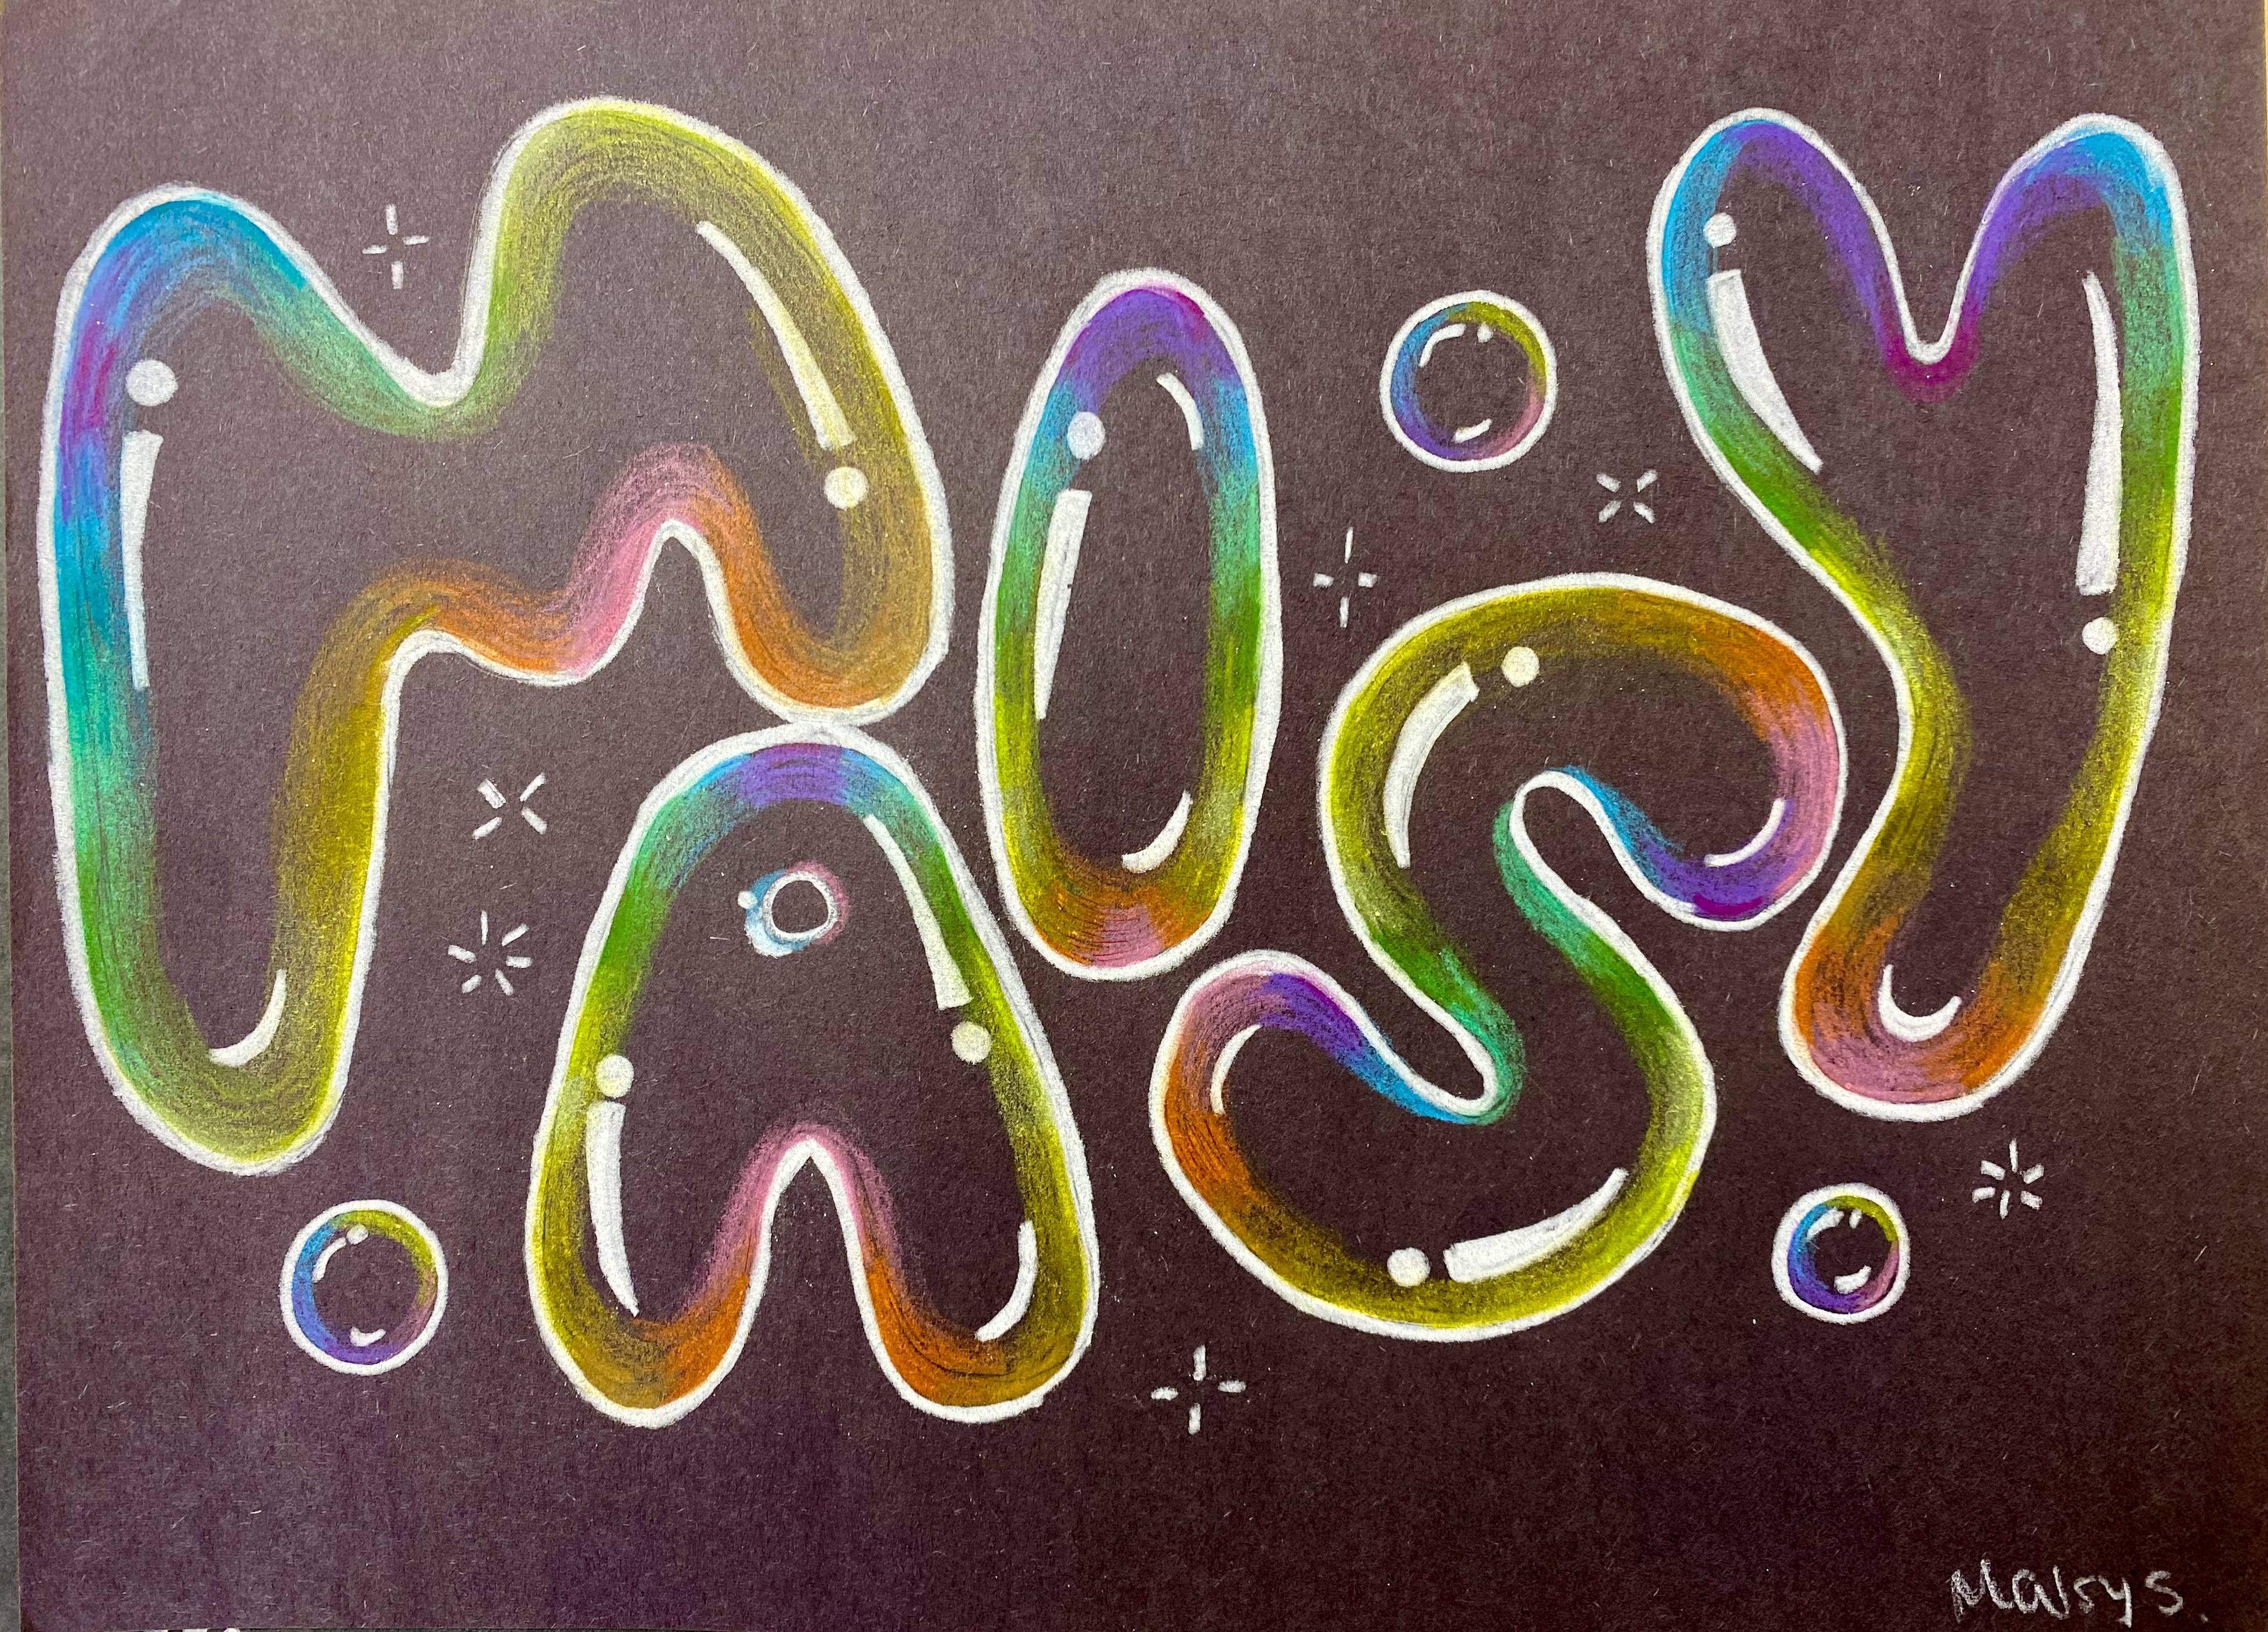
Planning for this assignment took some creative experimenting, trial, and error...
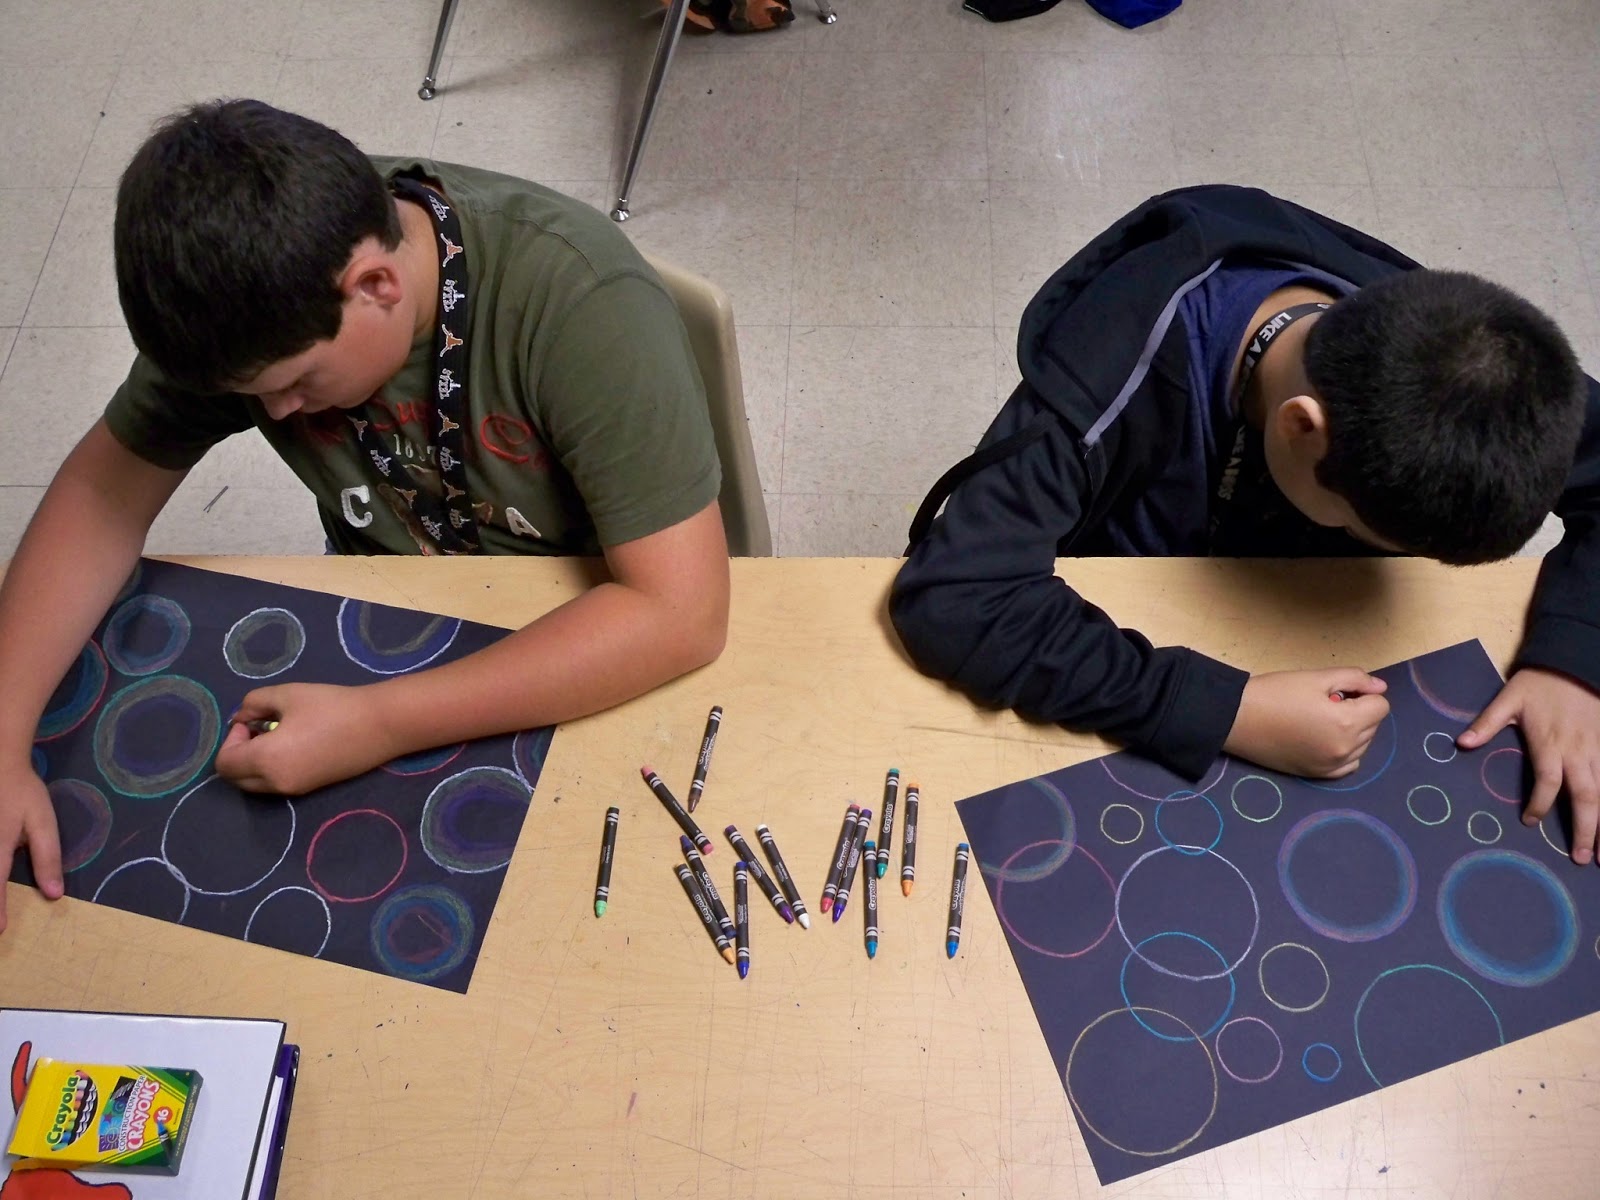
While toying around with the idea of this lesson, I originally liked they way the background of the real photos I found of bubbles was very blurry. So, I used the crayon resist method here. 
I drew the bubbles with white and baby blue crayons (make sure they are not washable!) and added some contour reflection lines inside. Then I used markers to sloppily add in a landscape using horizontal lines. 
Then I used a wet brush to go over the marker till it bled out making it blurry. The marker in the process washed off of the wax lines and left the bubble still visible (crayon resist method.). 
I did not like all the aspects of this first attempt, so I tried it on the black paper which I like much more.